Designer
Data Structure
To start modeling a new application it is first necessary to define the data structure. From there, we can start designing the application.
This modeling is very important, as it will define how the information will be captured in the forms.
Arkeyva has a wide variety of attribute types, among them:


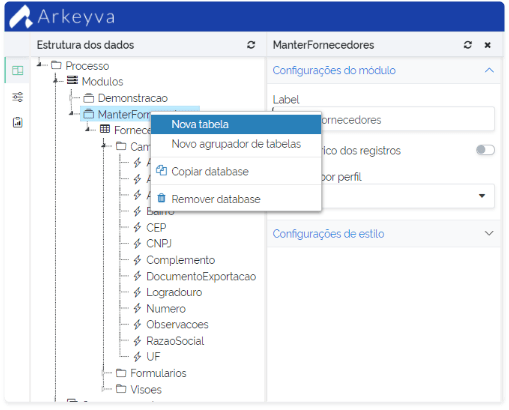
Table
During the creation of the tables, some important settings are available to the designer:
-
Define whether the table will create a record history.
A very important feature, by creating a history of records, the user will be able to track all information, including changes made over time. also allows improperly altered data to be recovered, returning to the original information. - Define if the table data will be restricted by access profiles.
Fields
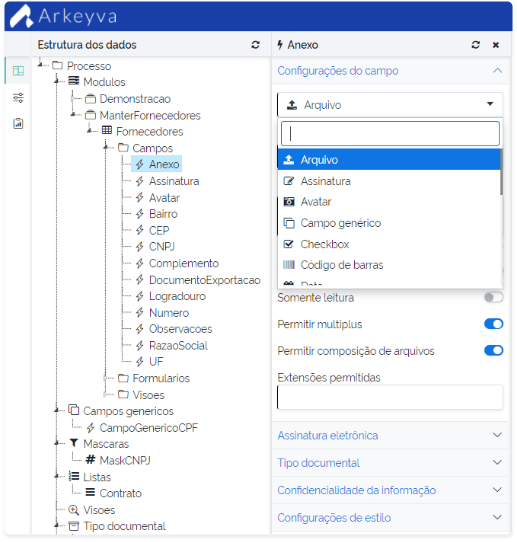
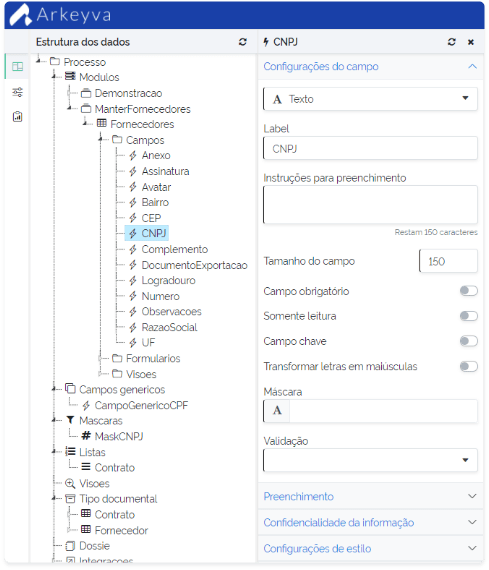
To meet the specifics of your business, the Data Structure fields have a diverse set of settings. Below are the general settings applied to all types of fields:
- Set the size, mandatory, default value, mask and validation.
- Encrypt the content.
- Restrict access based on access profiles.
- Style Settings.
Forms
Every Form is born from the defined Data Structure. This is where all the information is obtained by screen to be registered in the application. There are two types of forms: Public and Private. What sets each of them apart?
- Public Forms can be run outside the Arkeyva boundary. Therefore, it is possible to include them within a portal or corporate website, for example. Also, a Public Form does not require a user to be logged into Arkeyva for it to be loaded.
- Most commonly used, Private Forms are displayed only within the Arkeyva platform, so it is necessary to log in to the tool to view the information.
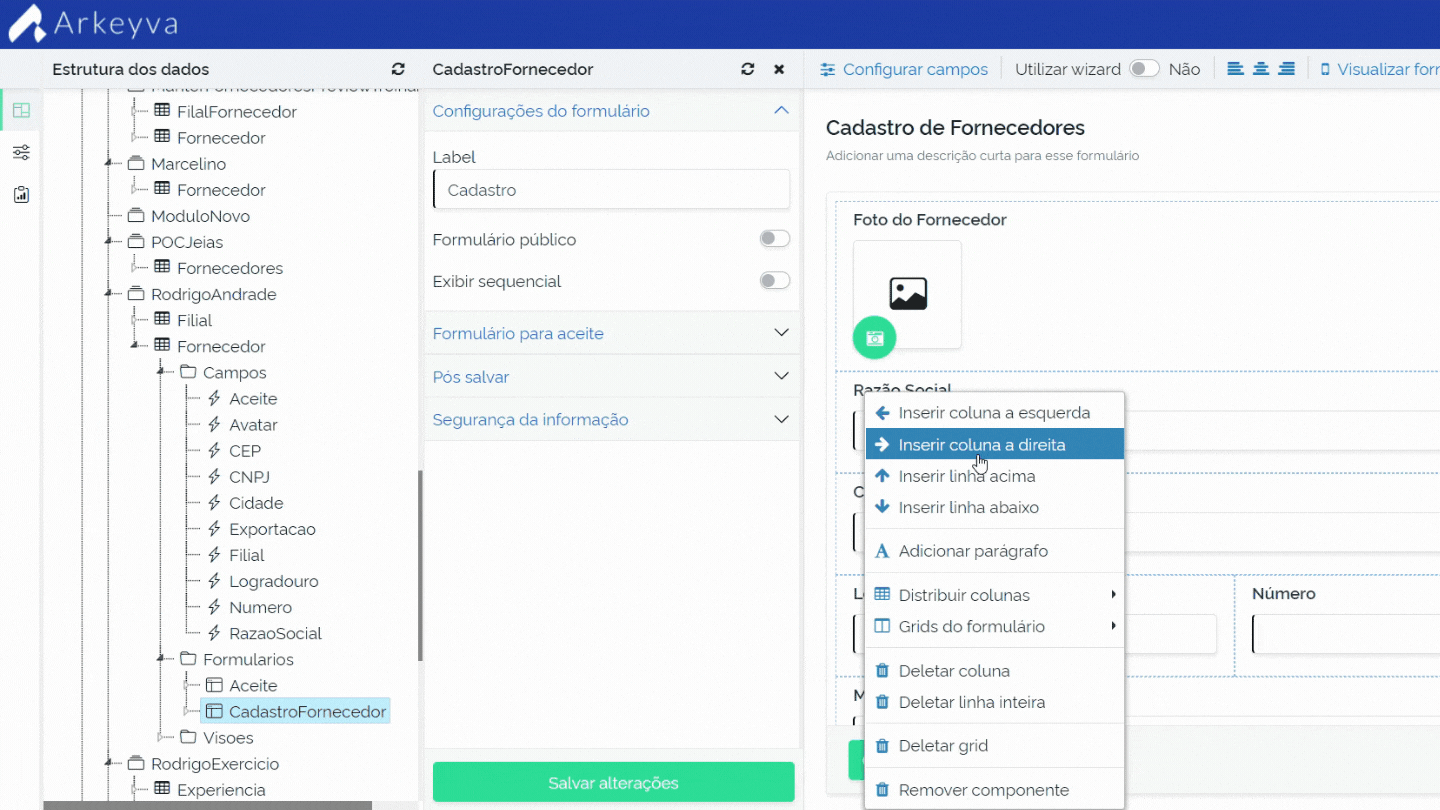
Three other important features of Forms are:
- Terms of Acceptance: It is possible to condition in a Form that the information will only be registered in the system if the user accepts the terms. Otherwise, the process will not be completed.
- Location Recording: For auditing purposes, it is possible to record the user’s location at the time the Form data is submitted.
- Profile Based Restriction: It is possible to restrict access to Forms according to the user’s profile
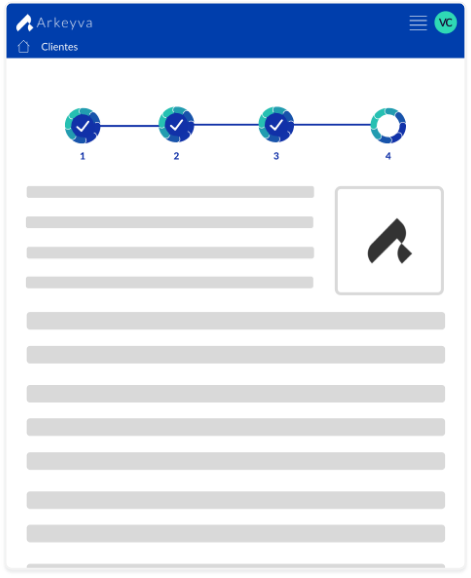
Wizard
The Wizard is one more resource for designing Forms. Imagine a situation where you have a large set of information to record, such as a customer record. Let’s assume that there is a series of data to be obtained, such as: Personal, Professional, Address, among others.
Would it be possible to put all this information on just one screen in the form? yes However, in addition to the screen being polluted with excess information, if any unforeseen occurs, all data will be lost. With the Wizard, you can create completion steps to enter this information.
Thus, in the example cited, the filling of the data could be done in 4 steps: personal, professional, address and other information. In addition to making the registration visually easier to execute, if there is a problem in the final step, the previous information will not be lost.
Remember: breaking complex processes into steps is always the best alternative from both an operational and a layout point of view.
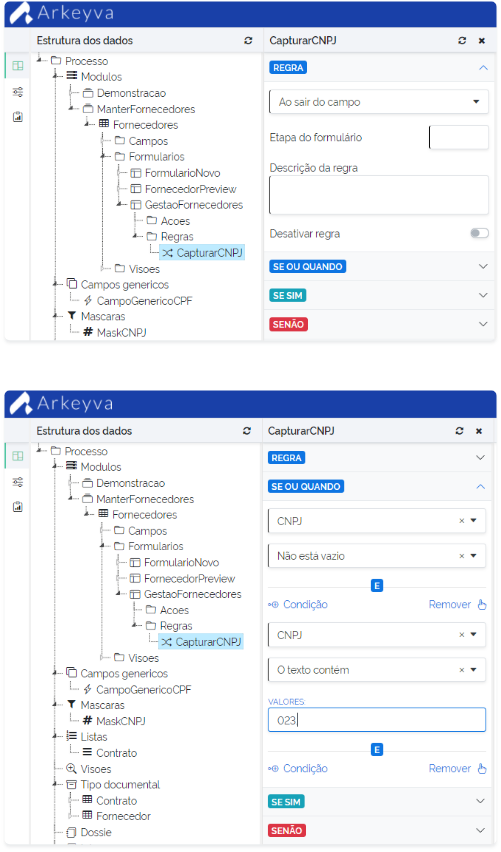
Rules in Forms
Build smart, dynamic forms based on rules. Arkeyva has a powerful engine, which, based on events, can execute a complete set of rules.
What are events? These are triggers that start the rule execution. Below is a list of possible events in the tool:
- When loading the screen.
- When leaving the field.
- By clicking the button.
- When saving the Form.
Example: Let’s suppose that the Form has a ZIP Code field. We can create a rule where, after filling in the ZIP Code, a rule is triggered that will perform an integration with the Post Office system, automatically completing the Street, District and City fields.
Having defined the event that will execute the rule, the next step is to establish the conditions that must be met for a certain action to be performed.
In Arkeyva it is possible, from a field of the Form, to establish several checks, such as: comparing values, checking the size, if it is filled in or contains certain information. In this way, verification conditions can be established to execute a certain rule or another.
Example: Let’s suppose that in the Form there is a field where the user needs to inform if a certain input data refers to an Individual or Legal Entity. From there we can create the following rule:
- If the field is filled with the information of Individual, the CPF and RG fields will be displayed. Otherwise, the CNPJ will be shown.
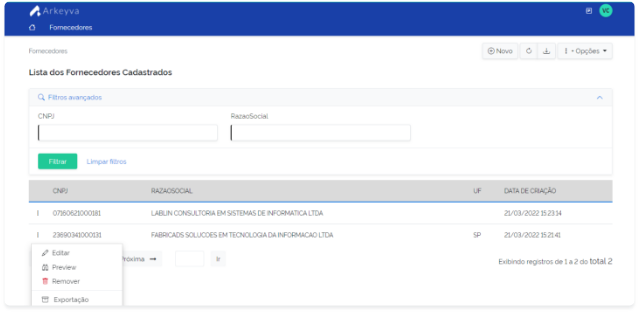
Visions
Unlike Forms, which are screens for capturing or changing data, Views bring us the records of a data structure. From the Views we can edit, preview or delete a particular record. In addition, other actions such as the button to add new records or export the records displayed on the screen are available.
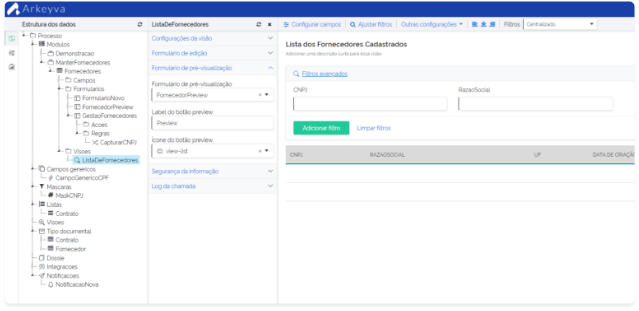
An important feature of Views is that you can create infinite combinations based on access profiles.
Example: If you have a list of employees in a certain sector, you can create at least three different Views: Director, who will be able to view the list with all employees in your department; Manager, who can list only the professionals under his/her management; and Coordinator, who will be able to view only the employees who are under his/her coordination.
How does it work? When a View is modeled, you can define fixed search filters. The filters will not appear on the screen, however, the information displayed will be filtered by them.
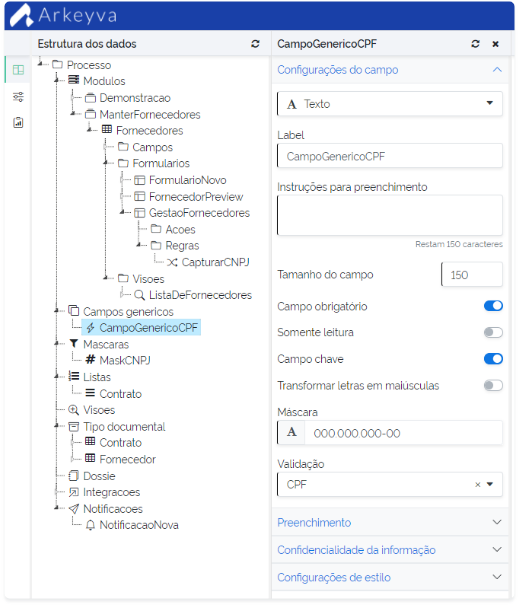
Generic Fields
There are fields that appear frequently on different screens, such as in registers or in list view. To avoid the trouble of creating the same spaces over and over again, Arkeyva relies on Generic Fields. Developed in a generic way, they can be reused in any Form or View, thus speeding up the creation of applications.
How does it work? In the Designer’s “Generic Fields” item, you create a generic attribute, establishing its type, size and requirement. Also, you can define the mask and validation rule. Some good examples of Generic Fields are: Phone number, CPF, CNPJ, E-mail, among others.
Once this is done, just indicate, for example, in the Phone number attribute, of the Employee table, that it is a Generic Field. After this association, the Phone attribute will inherit all settings from the Generic Field.